Accessing Jupyter Notebook#
Jupyter Notebook is an interactive computational environment, in which you can combine code execution, rich text, mathematics, plots and rich media.
Features of Jupyter Notebook#
Can be run from any web browser
Can run cell-by-cell to understand code easier
Easy to host server-side and useful for security
Starting and Accessing Jupyter Notebook#
Practice 1: Start Jupyter Notebook#
Tip
Sometimes you might not be able to activate your virtual environment because of another Anaconda installation. In that case, please make a new virtual environment (see Lesson 1.5)
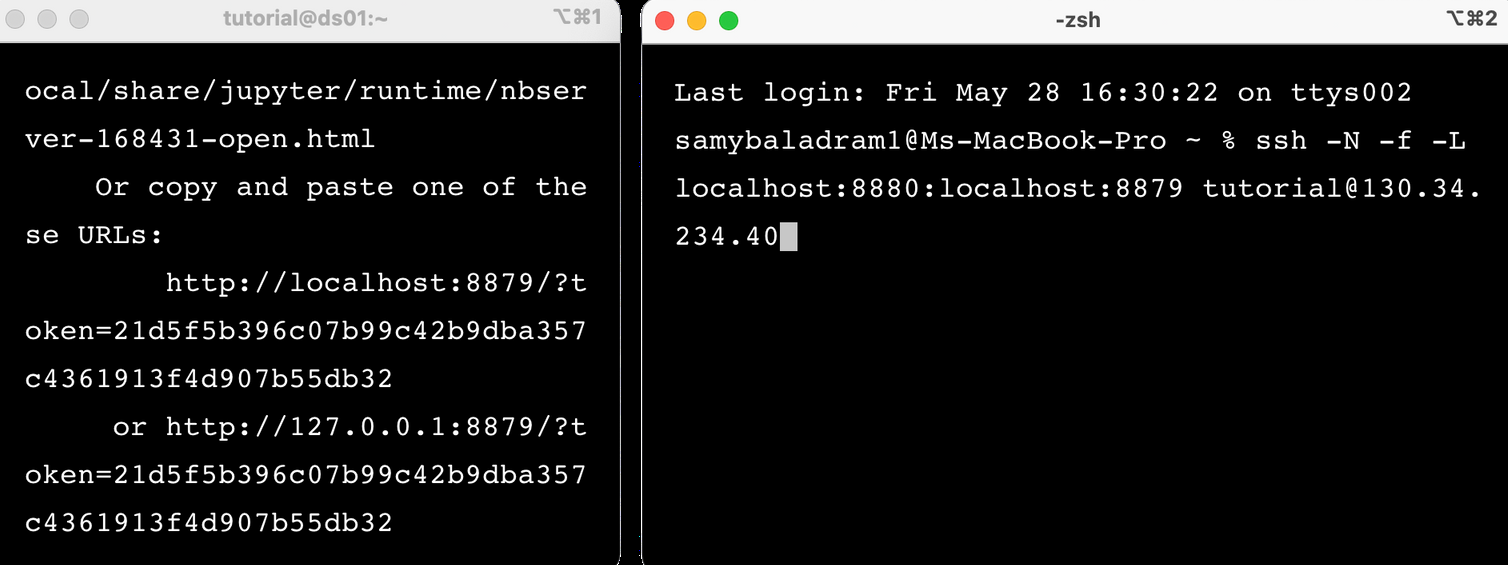
Log-in to the remote machine and activate your virtual environment. Then, start Jupyter Notebook to obtain the notebook link.
Tip
jupyter notebook --no-browser --port=8888: start up the jupyter notebook on port 8888
Expected output

Practice 2: Forward the remote server port to your local port#
Go to SSH on the bottom of the left pane to expand the menu and then click on Tunnels.
Enter the port number (
8888in the example, try8889,8890, etc. if it gives an error) that you want to use to access Jupyter on your local machine in Source port. Set the destination aslocalhost:8888where:8888is the number of the port that Jupyter Notebook is running on. Then click the Add button, and the ports should appear in the Forwarded ports list.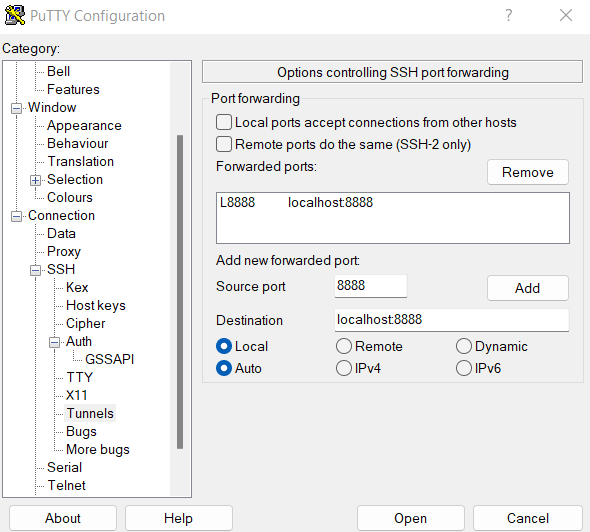
Save your configuration for later use (see Lesson 1.4).
Tip
ssh -N -f -L localhost:YYYY:localhost:XXXX *groupname*@130.34.234.40: forward port XXXX to YYYY and listen to it
Open another Command Prompt (Shell > New Window). In order to run Jupyter Notebook from your browser, forward this to port 8888 of your machine. (Try 8889, 8890, etc. if it gives an error)
Expected output
Practice 3: Opening Jupyter Notebook on Your Browser#
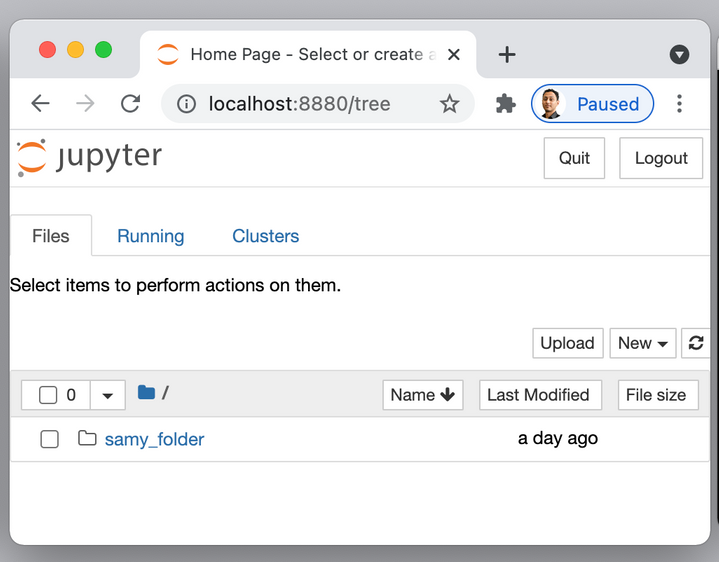
Open any browser (Google Chrome, etc.) and copy-paste the Jupyter Notebook URL from the old terminal. Change the host port number from the new terminal.
Expected output
Python vs Jupyter Notebook#
In Jupyter Notebook, the file is saved with the extension .ipynb. For many purposes, sometimes
the raw python file .py is necessary, especially when using the cluster machine.
We will try to make a simple program in both .ipynb and .py.
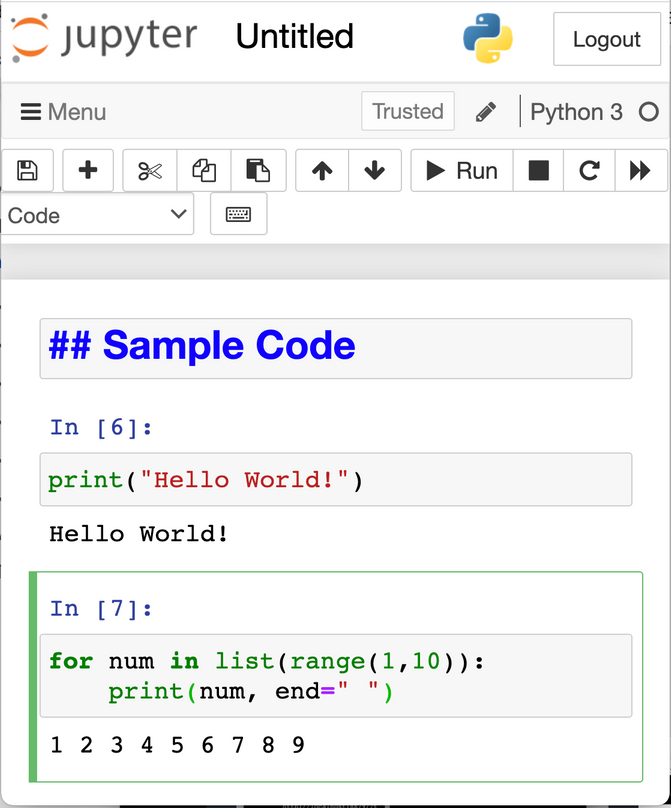
Practice 4: Operating Jupyter Notebook#
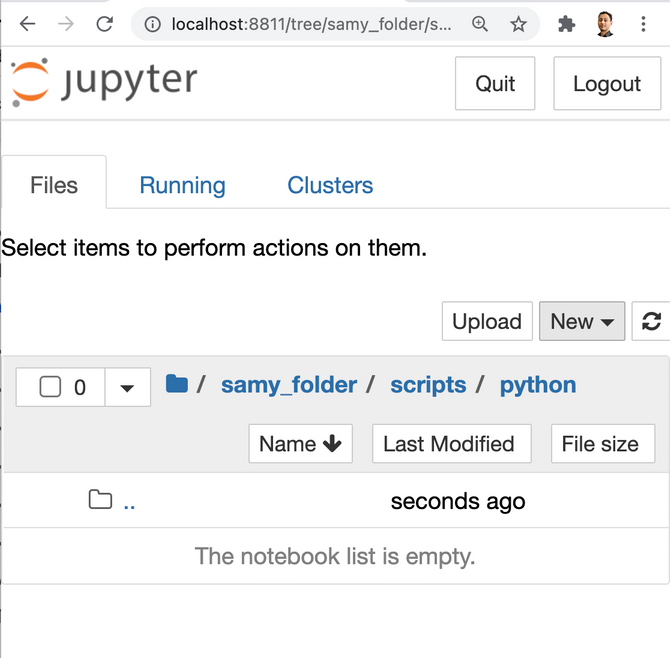
Make a new Python 3 file in the folder /yourfolder/scripts/python/. Then, make a simple header, print “Hello World”, and use a for loop to print numbers 1-10.
Expected output
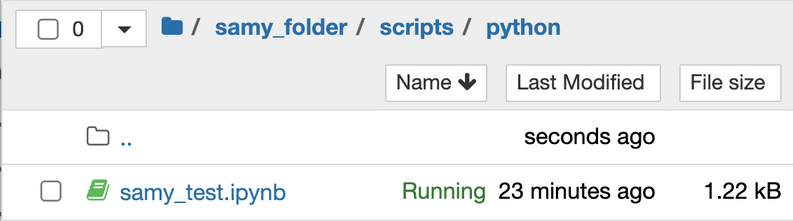
Practice 5: Saving Jupyter Notebook as a Python file#
Open the Menu in the upper left corner, save the previous Notebook as yourname_test and download that file as .py. Then, drag & drop the file to the Jupyter notebook interface.
Expected output

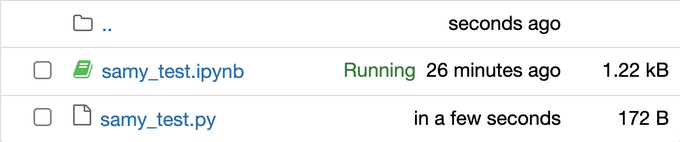
Practice 6: Running Python file on Server#
Open a new terminal window. After activating your virtual environment, run the Python file you just made.
Tip
python *filepath*: run python file
Expected output
